Wednesday, June 28, 2006
Submission
Handed everything in today, which is a huge weight off of my shoulders. No time to relax though, i must keep on the ball of this ever changing world of CG, and practice modelling. Plus i must start thinking about a story for next year, the BA year, where we make group films. I can't wait for that!!!
Tuesday, June 27, 2006
Finished Compositing : p
Finished compositing today, ready for handing in the 320 x 240 tomorrow. My showreel came in at 2.06 minutes; bit long maybe, but i chose an upbeat soundtrack that will have everyone jammin. I'm very pleased with it and after two terms, every rotating model is now burnt into my brain!! Shabba
Jims Chicken


I've been given the new and improved chicken run cycle from Jim Bending (jamesbending.co.uk). This one has much better animation. I modelled the chicken for him as he was running low on time for the completion of his film. I'm going to show the wireframe, shaded and textured versions all running next to each other. I also figured out how to give the chickens shadows in After Effects. This was done by duplicating each chicken animation, adjusting the brightness/contrast until the animation silhouetted and then scaling them down to shadow proportions beneath each chicken.


I also modelled Jim a mouse, but sadly he didn't have time to include him in his film.
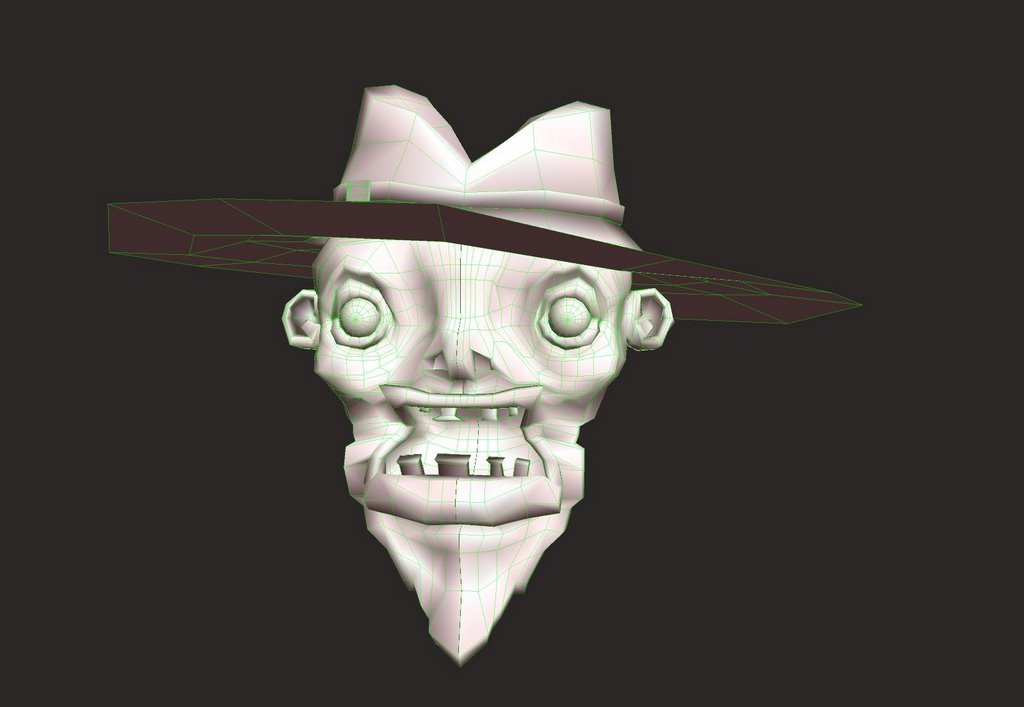
Jia's Character

Jia asked me to model the head of a character she designed for use in her animation. I was given the character profile drawings to work from, something that i don't usually use. I hate working from images on planes, i prefer to model freeely. The character is a completely different style to what i usually do, and so was quite a challenge. Plus the lips and eyelids had to move!! The head was modelled in Silo, and it was decided that the hair be left to Jia to model, as she wasn't sure how she wanted it at the time.
Saturday, June 24, 2006
Cowboy Concept


Just completed the concept painting for the cowboy character using photoshop and a wacom. This is going before the 3d model in my showreel along with the original pencil sketch. I don't think the 3d interpretation is far off. Back to compositing.
Wednesday, June 21, 2006
The Joy Of Painting - Without Bob Ross


Hiiiddy Ho. After a lot of colour experimentation and rendering problems, i have finally finished him. As well as painting the colours, i also discovered that you can paint bump, and specular maps using the 3d paint tool. With high quality rendering turned on, you can also see the effects of both as you paint in real time, although it nearly kills the computer. (thanks Rag!!) Using this i bump mapped dents into the crash helmet, making it look like he's had a tough life, and painted specular colours on his boots, belt, skin, lips and finger nails.
The character is also lit using three point lights with orangy glows and the now overused global illumination. Now for the joys of rendering. Boooo
Sunday, June 18, 2006
New Title Sequence

Just been busy creating a new title sequence for my showreel in Maya. I liked the old one from my first animatic, but its time to jazz things up and make this look uber professional. I modelled a giant block with lots of other extruded blocks coming out and duplicated it twice. I then assigned thick, black outlines to the model using the Toon options and its ramp shader. It was then animated coming towards the camera at speed. The red and pink colour isn't final, i'll experiment with the hue/saturation in After Effects.
The Trouble With Textures

Had a bit of trouble figuring out the 3d paint tool lately. Some of the textures that i've painted wouldn't render, and just appeared completely black. Anyways i finally realised that you had to save the texture after applying it..duh!! All is well now. I've been using my wacom pen to paint the textures as its 10X's easier than using the damn mouse and its pressure sensitive. The mod/knievel character is almost complete, though i'm still playing around with colours and types of materials. Here's a test render.
Wednesday, June 14, 2006
Done


Whoohoo....he's done. I've now modelled the cape to finish off the character. It took quite a while to make it look like it was blowing in the wind, but i think it does the trick. I wasn't planning to texture my characters, but thanks to a certain Mr.Richie Hoyle, i have now discovered the joys of the 3d paint tool in Maya. The 3d paint tool allows you to paint directly on to your model, without the need of laying out all of those evil UV thingy majjigers. It's just sooo much easier to texture this way....you can see what your texturing for a start!! Obviously the results aren't as accurate as the Photoshop method, but it does the trick. It'll be good to show some form of texturing as it would add some life into my models, but for the moment i'm just going to experiment with the 3d paint tool. For the time being, i've bee doing some lighting tests with ambient occlusion and global illumination, which are really good at picking out the detail in a model.
Tuesday, June 13, 2006
These Boots Are Made For Walking
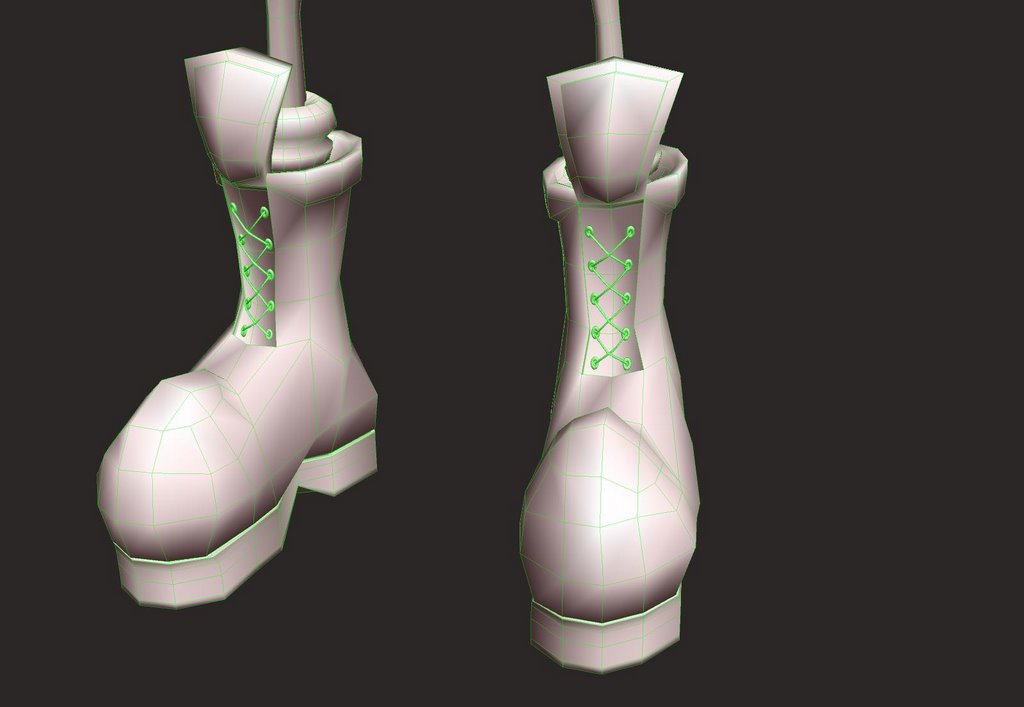

Hello....he's almost finished. I've now modelled the legs, jacket (complete with giant buttons) boots and a belt. Although you'll hardly see them when rendered; i also modelled the laces for the boots. The last thing to add is a cape. Some people might do this using the cloth simulator in Maya.....but nooo, i'm going to have a go at modelling it. Doing cloth in Maya requires a lot of constant tweaking and general time wasting and often the results are not what you want. With me modelling it, i'll be able to make it the way i want it.
Sunday, June 11, 2006
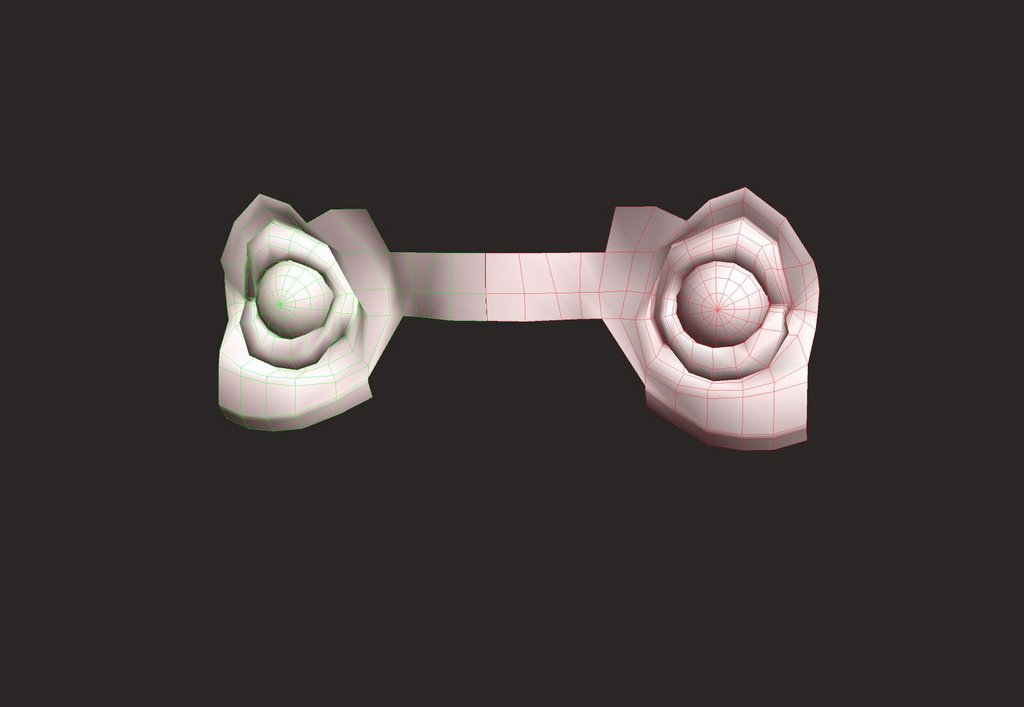
Chubby Didgits


Just completed the torso area of the new character, including the hands. As this is my fourth model, I am now finding hands a lot easier to model. After a lot of tweaking I have even managed to spread out the fingers on this model to make him appear less rigid and robotic-looking, not good for rigging i know, but this is a modeling showreel!! There's no need to model the shoulder area as i'm going to model a jacket over the arms and torso....if all goes according to plan. Oh yea... i also added a loose strap coming from his helmet for extra ooomph
Tuesday, June 06, 2006
Yosemite Sam


I wasn't really happy with the lighting that i used for my cowboy character in my formative animatic, so i have now re-rendered the entire lot. The first render suffered from a lack of shadows and the colours looked a tad washed out. I have now upped the shadows and made him look much more cartoony, which is what i was hoping for. Here are some of the progress shots that i took whilst modelling.
Sunday, June 04, 2006
The Finished Head

 I've now added the crash helmet and goggles to the head...whew!! The helmet took quite a few attempts to get right and and fit around his head without bits sticking out. It was made purely from a sphere that i hacked apart and extruded inwards a few times to create the foam lining of the helmet. The big problem i had was with the ears. I really liked his ears and wanted them to be seen, so i modified the sides of the helmet using booleans, allowing the ears to stick out. Next step.... the body!!
Saturday, June 03, 2006
Angelina Jolie Lips


The head is almost complete. I've added little ears, the nose, and the lips. Thel lips were done after i was satisfied with rest of the head as i needed to mirror the geometry ready for the modeling of the unsymetrical lips. I also modelled the eyebows from a cube and shaped them around his head for added expression. I'm still playing around with the width of his head; i think he looks cooler with a smaller head.
The Eyes

Just started on the eyes of the character in Silo. I started by creating a sphere for the eyeball and then from one flat plane, patch modelled by extruding the edges around the eye to form the eyelids. From the eyelids i move on to the eye socket, cheeks etc. I'm only going to model one side of the face and instance mirror the other half, keeping it symetrical. I'm going to make the lips unsymetrical, so i will do them after i have properly mirrored the rest of the face. I want to make the lips really big and droopy!!
The Next Character
Welcome to this thrilling blogfest!! Follow me as i progress through my final term of the 2nd year Animation course. The final term involves us students developing a showreel, which we could then potentially take to an employer and force them to give us a job making tea. Currently i have modelled three characters for my showreel; two are my own designs and the other is a classmate from college. I'm trying to make them as wacky and original as possible....no swords, ninja's or girls with watermellons for boobs!! My next character will be an Evil Knievel type character, who wears a crash helmet and goggles. I'm going to use Silo for the modelling and then transfer it into Maya 7 for the lighting, texturing and rendering.
In the meantime i've been asked by Moody (my flatmate) to help model some props for his BA film. The props include, girders, a satellite dish, cans, lightbulb, umbrella, bus shelter and a skip.

In the meantime i've been asked by Moody (my flatmate) to help model some props for his BA film. The props include, girders, a satellite dish, cans, lightbulb, umbrella, bus shelter and a skip.


Subscribe to:
Comments (Atom)